MITCHEL SMITH -
TECHNICAL DESIGNER
Four Course Dungeon
by Salty Slimeballs
Four Course Dungeon is a third-person hack-and-slash game about a young elf named Paprika who enters the legendary cooking show Four Course Dungeon in order to earn the title of Legendary Dragon Chef. The game takes place within three rounds, with each round having a Combat round and a Cooking round. Within the Combat round, players hunt creatures, collect the ingredients that drop from enemies, and bring those dishes over into the Cooking round. The Cooking round is where you will use your collected ingredients to cook dishes. Four Course Dungeon was developed within Unreal Engine 4 by Salty Slimeballs, a team of 19 students, over the course of 2 semesters. It was created within the Game Design Workshop course at the University of Central Florida and released on Steam on May 27th, 2022. Click Here to go to the game's steam page and play it for free!
Background by GDJ on Pixabay.com
Video 1: Introduction to the game, Four Course Dungeon.
Project Contributions
-
Second Semester Technical Lead
-
Assign tasks to Code and UI teams through ClickUp software.
-
Maintain daily communication with team members and project leads.
-
-
Optimization and Balancing
-
Combat Mechanics
-
Player Damage
-
Enemy Damage
-
Combo System
-
Weapon Classes
-
-
Player Movement Mechanics
-
Base Player and Camera Movement
-
Backwards Dodge
-
Speed-increasing Charge/Sprint
-
-
Environmental Mechanics
-
Spline-based Moving Platforms
-
Geyser Force-based Push Movement
-
-
Enemy Mechanics
-
Slime Puddle Damage
-
Slime Splitting
-
On the team, I was a programmer focused primarily on coding combat mechanics, player movement mechanics, environmental mechanics, and enemy mechanics. During the second semester, I also acted as Salty Slimeballs' Tech Lead and balancing specialist. As a Tech Lead, I assigned tasks to the code and UI teams and kept daily communications with team members and the other project leads. Four Course Dungeon was coded entirely within UE4's Blueprints visual scripting.
Skills Learned
-
Schedule, coordinate, and lead programming meetings.
-
Document and assign tasks through ClickUp Software.
-
Utilize a smooth workflow through Tortoise SVN team source control.
-
Applying animation notify states to animation montages for combo systems and attack collisions.
-
Incorporating splines for platform movement.
-
UI-based waypoint systems.
-
Blueprints optimization.
-
Gameplay balancing utilizing Microsoft Excel.
Player Combo & Damage System, Weapon Types, & Status Effects
Video 2: Finished Combo & Damage Systems, Weapon Types, Swapping Weapons, and Status Effects
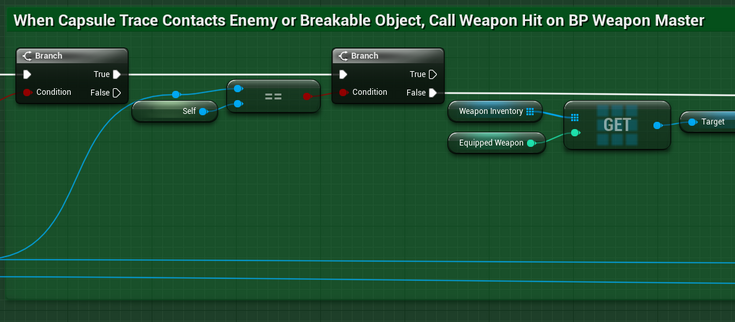
For Four Course Dungeon, I contributed to combat through the inclusion of player damage, enemy damage, and the combo system. Once the art team provided me with the necessary weapon attack animations, I, along with Creative Director Kyle Hand, utilized animation notify states within the attack animation montages to turn on and off the collision of capsule traces on the weapons. While Kyle Hand created the initial code for turning on and off the hit detection on the knives, I iterated upon that code by creating an event titled Melee Capsule Trace that could be utilized multiple times within the code to provide varying radii and half heights for the capsule traces depending on the weapon currently being utilized. Additionally, I reimplemented Kyle's code to function with all three weapon types. Aside from this, I also updated my code for detecting the enemies hit with the weapons to work with the new capsule traces. These capsule traces replaced the box colliders originally on the weapon meshes and allowed for a significantly larger area for hit detection, which increased the likelihood of the player hitting and damaging an enemy.
For the updated combo system, I also utilized animation notify states within the attack montages to determine if the player clicks the attack button once more during the attack animation or if the player does not before the animation ends. If the player presses the attack button before the first notify state, then the next attack in the combo plays. However, if the player waits too long, then the second notify state occurs, resetting the combo to the first attack. This method forgoes the timer and instead utilizes the timing of the animations themselves. Additionally, the combo system also calls a function that moves the player towards the desired enemy through a lunge. This occurs when a sphere trace detects the enemy in front of the player.
Gallery 1: Combo & Damage Systems Code
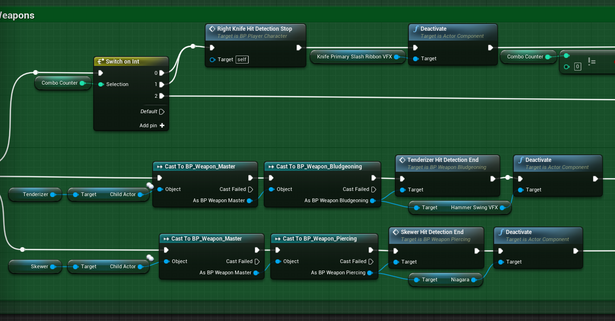
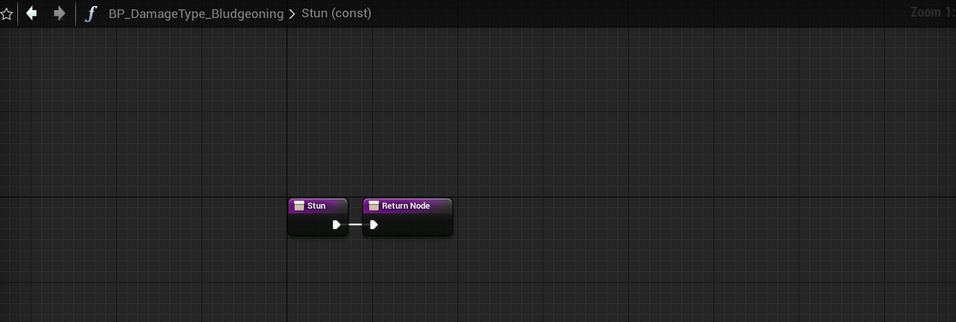
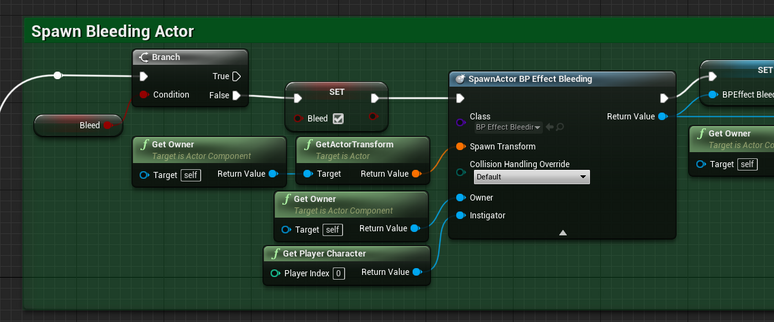
After the Combo and Damage system, I implemented the weapons and their respective status effects. Not only did I include the slashing (knives), bludgeoning (tenderizer), and piercing (skewer) weapon types, each with their own weapon classes based on the weapon master class, but also incorporated the status effects for each of the respective weapons. Status effects are only given to enemies if the player hits them with the third and final combo move. Slashing weapons result in the bleed status effect, which damages the enemy for 2 damage every second for around 4 seconds after the initial hit. Bludgeoning weapons produce the stun effect, which stop enemy movement for 3 seconds. Finally, piercing weapons give enemies the slow effect, which reduces enemy movement speed by half for 3 seconds. In addition to status effects, I also added knockback to the third combo move of the knives and every move of the tenderizer. Additionally, the tenderizer produces an area-of-effect shockwave on its third combo move that damages and pushes back all enemies within a certain radius. Aside from this, I also implemented weapon swapping into the game.
Gallery 2: Weapon Selection Code
Gallery 3: Weapon Types Code
Gallery 4: Status Effect Code
Slime Enemies
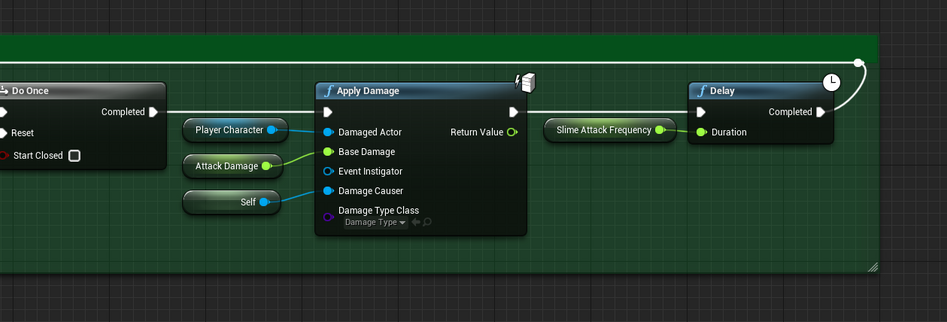
For the slime enemy, other programmers were tasked with the AI of the enemy while I took care of the other slime enemy mechanics. For example, I made it so that the slime enemy would spawn a slime puddle every few seconds. This slime puddle damages the player every second and reduces the player's movement speed and jump height for as long as the player is touching the puddle. After several seconds, the slime puddle is destroyed for a second and then respawns. Aside from this, when the slime is damaged, it respawns and spawns in two more slimes that are half the size of the original slime. Slimes comes in two sizes, and the smallest slimes will not spawn new slimes.
Video 3: Slime Enemy Demo
Gallery 5: Slime Enemy Code
Player Animation & VFX Gameplay Implementation
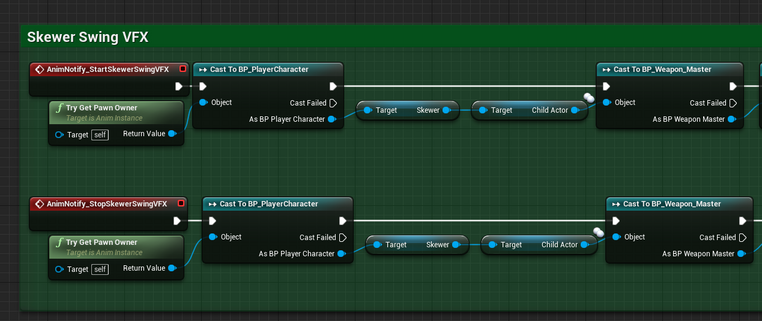
Aside from some of the major mechanics I programmed, I was also in charge of implementing the VFX and animations created by the Art Team for the player character. Some of the VFX I implemented include: the bleed VFX for when the player takes damage from an enemy; the enemy VFX when they are hit with each weapon's specialized status effect; the Charge VFX; the weapon attack VFX; and the lava damage VFX on the player. The weapon attack VFX were implemented by activating and deactivating the Niagara systems based on animation notify states in each weapon's attack montages. Alternatively, the Charge VFX is activated when the player reaches a certain movement speed while Charging.
For programming the player animations, I created animation montages utilizing animations from the Art Team and utilized the Locomotion State Machine to implement the jump, walk, run, Dodge, and Charge animations. For added complexity, as each animation needed to have three versions for each of the equipped weapons, I utilized blend spaces that change which animation is played based on which weapon is currently equipped by the player. These blend spaces allow for a significantly cleaner and more streamline Locomotion State Machine compared to creating separate versions of the jump, walk, Charge, and Dodge states for each weapon.
Gallery 6: Player Animation & VFX Implementation Code
Base Cooking Station & Minigame Functionality
In addition to the previous responsibilities, the other primary mechanics I needed to program were the base Interactable Object code; the base Minigame implementation, including the transition from the player camera to the minigame camera; and the Minigame Progress Bars. Other responsibilities included implementing the polished animations, movements, and other VFX to make the minigames feel as pristine as possible. Aside from these, while the Mixer and Freezer Minigames were programmed by Kyle Hand, I fully developed the Oven Minigame's implementation on my own.
Within the game, I developed three separate layers of children when it comes to the Interactable Objects and Minigames. The main parent is the Interactable Object blueprint, with the children of that being the Food Tubes and the Minigame Master blueprint. Finally, all three minigame blueprints are children of the Minigame Master blueprint.
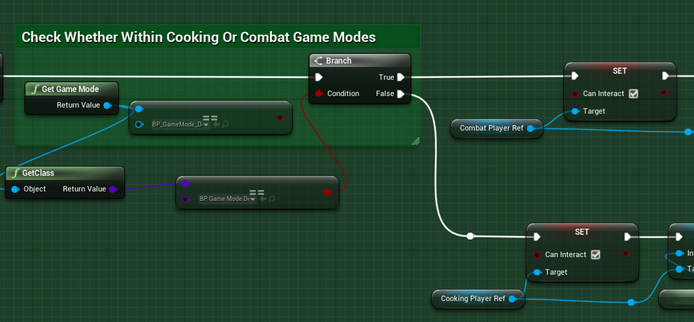
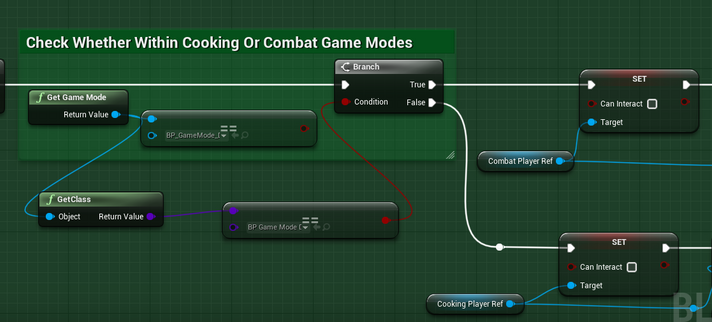
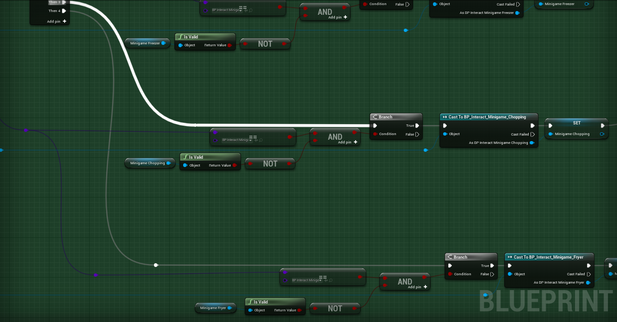
To begin, I first created a simplified copy of the combat player character blueprint, which would act as the player character for the cooking section. With the two separate player characters, I could check within the Interactable Object blueprint which player character the player was currently controlling, which would determine what Interact functionality would then be utilized during gameplay. When the player presses the Interact button while within the Interactable Object's box collider, the Interact Interface for the current Interactable Object is called, beginning that object's functionality. At this point, if the object is a minigame, then a reference is set for that specific type of minigame and the Interactable Interfaces for both the Minigame Master blueprint and the specific minigame blueprint are called simultaneously.
The Minigame Master Blueprint controls the change in cameras from the player camera to the minigame camera. When the player presses the Interact button when not within the minigame camera view, the player's camera blends over to the minigame camera, and the player character's visibility is set to false to ensure clear visibility of the minigame for the player. Additionally, all player functionality besides the current minigame's controls is disabled. If the player is already in the minigame view, then the camera blends back into the player camera, and the player's visibility is set back to true. Likewise, the minigame functionality is disabled, and the rest of the player's functionality is returned.
Gallery 7: Interaction Code
Gallery 8: Minigame Master Code
Video 4: Slime Enemy Demo
Minigame Progress Bars
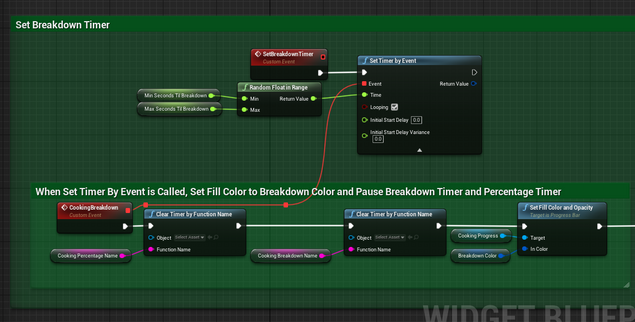
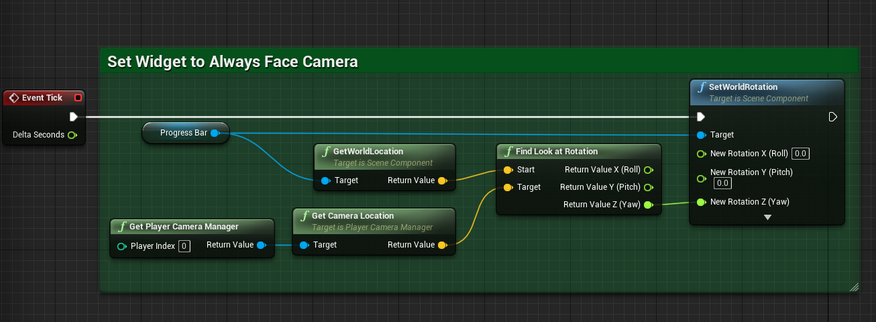
Above each cooking station is a widget component that acts as a progress bar and determines how close to completion each minigame is. At the start of a Cooking round, an invisible timer starts that increases the percentage of the progress bar filled each second based on the customizable time it takes for the bar to fill completely. At the same time as the percentage timer, another invisible timer, called the breakdown timer, begins ticking at a random interval selected between custom minimum and maximum values. When the breakdown timer ticks, the minigame the current progress bar is connected to commences its breakdown functionality. During a breakdown, the percentage timer stops ticking, the color of the progress bar shifts from yellow to red, and the progress bar's percentage stops increasing.
Once the player completes the minigame for the broken-down Cooking Station, then both timers begin ticking once more, with the breakdown timer's tick interval being randomly selected once more in order to add variety to when the minigame breaks down. In addition to this, the progress bar once again begins to fill up, and the color changes back to yellow. As soon as the progress bar's percentage reaches one-hundred percent, which is tracked within the code for the percentage timer, then the progress bar's color shifts to green, both timers stop ticking, the progress bar stops increasing, and the cooking station's Complete functionality begins.
To ensure that each cooking round increases in difficulty, I playtested through the cooking round with varying values for the minimum seconds until breakdown, maximum seconds until breakdown, and then the number of seconds required for the progress bar to fill to one-hundred percent. After determining the right appropriate levels of difficulty, I programmed functionality within the progress bar code that determines on play which round of Cooking the player is currently on and then changes these values to the appropriate values for that round. With this implemented, the game contains ramping difficulty levels for the different Cooking rounds.
Gallery 9: Minigame Progress Bar Code
Oven Minigame
The Oven Cooking Station minigame is the only minigame that I fully programmed myself. The Oven minigame consists of two dials that the player needs to rotate to pre-determined positions in order to fix the breakdown. Surrounding each dial are eleven lights that indicate to the player the appropriate positions that each dial needs to be set to. When a position is the required position for the current breakdown, the light changes to a red color. Otherwise, the lights are set to a white color. The lights turn from red green when the dial is set to that correct position.
At the start of a Cooking round, the relative rotation of the dials are set to their starting positions, and the lights are set to their base white color. When the Oven's breakdown functionality is called by the Oven's progress bar, the required position for each dial is randomly set to one of each dials' positions. Additionally, the associated light for each required position is changed to the red color.
To turn the dials, the player utilizes the A and D keys to turn the left dial and the left and right mouse buttons to turn the right dial. On gamepad, the left and right dials are rotated utilizing the left and right thumbsticks, respectively. The current position each dial is on is both set and checked based on the current rotation of the dial compared to its starting rotation. For each world tick that the player's input is registered, the current input's value (positive or negative) is added to the current rotation of the dial, with the value of the current rotation being set to the relative rotation of the dial directly after adding on the input value. Additionally, after setting the relative rotation, the dial's rotation is checked to see if it is in the appropriate range for the required position.
Each required position has an equivalent range of values that dial's current rotation must be within to count as being in that position. If the current rotation is within the correct range, then the light turns green, and that dial is determined to be in that correct range and position through a bool. If both dials are in the correct positions, then the timers on the progress bar begins ticking once again, and the lights for the required positions are reset to white.
When the Oven's Progress Bar is complete, then all lights on the minigame are changed to the green color, and the minigame is set to "complete" through a bool.
Gallery 10: Oven Minigame Code
Video 5: Oven Minigame Demo
Cooking Station Polish Implementation
After completing my initial prototyping work on the Oven Cooking Station, I was tasked to add visual polish to the three existing minigame whitebox prototypes. This polish was created through a mixture of particle effects, lighting, and utilizing timelines to move components on the minigames based on player interaction with their respective minigames. One of the beginning forms of polish was implementing sparks particle effects, provided by the Art Team, shooting off of broken-down minigames.
The Oven Cooking Station's polish includes the changing lights based on which positions on the dials are required and if the player's dial is in the correct position. Similarly, another polish is that the dials physically rotate to reflect each dial's current rotation and position. The other final polish on this minigame is that I added three separate smoke trails to go on top of the three pipes exiting the top of the Oven minigame. These smoke trails remain on until the minigame breaks down or has its progress bar fully complete.
Gallery 11: Cooking Station Polish Code
Combat Balancing
One of my final responsibilities within development was to balance combat within gameplay. To do this, I went through the game and found information on the duration of enemy attacks, the amount of damage dealt through those attacks, how much damage the weapons do, and how long the animations for attacks are. Using this information, I developed a system to properly equate the values of all three of the weapons utilizing the damage dealt per weapon as well as how much health is saved as a result of each weapon's status effect. Determining these values required me to look at the damages of every enemy attack, the duration of the status effects, how many enemies of each type are within the game, what percentage of total enemies are of each enemy type, and what the weighted value for each status effect is based on the probability of running into one enemy type over another. After finding the weapon values, I changed the damage dealt for each weapon, what enemies are resistant or submissive to each weapon, and the duration and damage of status effects. All of these changes led to a significantly more balanced combat experience through having the Weighted Average Total Damage for each weapon type becoming nearly equivalent to each other. The Excel Spreadsheet showcasing all of the found information, as well as the changes implemented, is linked here.


